In this article, we will teach you how to install your own automation environment and run your own tests using Selenium/WebDriver and a testing library such as selenium-webdriver for Node. We will also look at how to integrate your local testing environment with commercial tools like the ones discussed in the previous article.
| Prerequisites: | Familiarity with the core HTML , CSS ,和 JavaScript languages; an idea of the high-level principles of cross browser testing ,和 automated testing . |
|---|---|
| Objective: | To show how to set up a Selenium testing environment locally and run tests with it, and how to integrate it with tools like LambdaTest, Sauce Labs, and BrowserStack. |
Selenium is the most popular browser automation tool. There are other ways, but the best way to use Selenium is via WebDriver, a powerful API that builds on top of Selenium and makes calls to a browser to automate it, carrying out actions such as "open this web page", "move over this element on the page", "click this link", "see whether the link opens this URL", etc. This is ideal for running automated tests.
How you install and use WebDriver depends on what programming environment you want to use to write and run your tests. Most popular environments have available a package or framework that will install WebDriver and the bindings required to communicate with WebDriver using this language, for example, Java, C#, Ruby, Python, JavaScript (Node), etc. See Setting Up a Selenium-WebDriver Project for more details of Selenium setups for different languages.
Different browsers require different drivers to allow WebDriver to communicate with and control them. See Platforms Supported by Selenium for more information on where to get browser drivers from, etc.
We will cover writing and running Selenium tests using Node.js, as it is quick and easy to get started, and a more familiar environment for front end devs.
注意: If you want to find out how to use WebDriver with other server-side environments, also check out Platforms Supported by Selenium for some useful links.
selenium-test
.
npm install selenium-webdriver
注意: It is still a good idea to follow these steps even if you previously installed selenium-webdriver and downloaded the browser drivers. You should make sure that everything is up-to-date.
Next, you need to download the relevant drivers to allow WebDriver to control the browsers you want to test. You can find details of where to get them from on the selenium-webdriver page (see the table in the first section.) Obviously, some of the browsers are OS-specific, but we're going to stick with Firefox and Chrome, as they are available across all the main OSes.
chromedriver
and
geckodriver
driver's location to your system
PATH
variable. This should be an absolute path from the root of your hard disk, to the directory containing the drivers. For example, if we were using a macOS machine, our user name was bob, and we put our drivers in the root of our home folder, the path would be
/Users/bob
.
注意:
Just to reiterate, the path you add to
PATH
needs to be the path to the directory containing the drivers, not the paths to the drivers themselves! This is a common mistake.
To set your
PATH
variable on a macOS system and on most Linux systems:
bash
shell (for example, on macOS systems, the default is the
zsh
shell, not
bash
), switch to the
bash
shell:
exec bash
.bash_profile
(或
.bashrc
) file (if you can't see hidden files, you'll need to display them, see
Show/Hide hidden files in Mac OS X
or
Show hidden folders in Ubuntu
).
#Add WebDriver browser drivers to PATH
export PATH=$PATH:/Users/bob
PATH
variable by entering the following into your terminal:
echo $PATH
To set your
PATH
variable on Windows, follow the instructions at
How can I add a new folder to my system path?
OK, let's try a quick test to make sure everything is working.
google_test.js
:
const webdriver = require('selenium-webdriver'),
    By = webdriver.By,
    until = webdriver.until;
const driver = new webdriver.Builder()
    .forBrowser('firefox')
    .build();
driver.get('http://www.google.com');
driver.findElement(By.name('q')).sendKeys('webdriver');
driver.sleep(1000).then(function() {
  driver.findElement(By.name('q')).sendKeys(webdriver.Key.TAB);
});
driver.findElement(By.name('btnK')).click();
driver.sleep(2000).then(function() {
  driver.getTitle().then(function(title) {
    if(title === 'webdriver - Google Search') {
      console.log('Test passed');
    } else {
      console.log('Test failed');
    }
    driver.quit();
  });
});
node google_test
You should see an instance of Firefox automatically open up! Google should automatically be loaded in a tab, "webdriver" should be entered in the search box, and the search button will be clicked. WebDriver will then wait for 2 seconds; the document title is then accessed, and if it is "webdriver - Google Search", we will return a message to claim the test is passed. WebDriver will then close down the Firefox instance and stop.
There is also nothing to stop you running the test on multiple browsers simultaneously. Let's try this!
google_test_multiple.js
. You can feel free to change the references to some of the other browsers we added, remove them, etc., depending on what browsers you have available to test on your operating system. You'll need to make sure you have the right browser drivers set up on your system. In terms of what string to use inside the
.forBrowser()
method for other browsers, see the
Browser enum
reference page.
const webdriver = require('selenium-webdriver'),
    By = webdriver.By,
    until = webdriver.until;
let driver_fx = new webdriver.Builder()
    .forBrowser('firefox')
    .build();
let driver_chr = new webdriver.Builder()
    .forBrowser('chrome')
    .build();
searchTest(driver_fx);
searchTest(driver_chr);
function searchTest(driver) {
  driver.get('http://www.google.com');
  driver.findElement(By.name('q')).sendKeys('webdriver');
  driver.sleep(1000).then(function() {
    driver.findElement(By.name('q')).sendKeys(webdriver.Key.TAB);
  });
  driver.findElement(By.name('btnK')).click();
  driver.sleep(2000).then(function() {
    driver.getTitle().then(function(title) {
      if(title === 'webdriver - Google Search') {
        console.log('Test passed');
      } else {
        console.log('Test failed');
      }
      driver.quit();
    });
  });
}
node google_test_multiple
So here we've done the test as before, except that this time we've wrapped it inside a function,
searchTest()
. We've created new browser instances for multiple browsers, then passed each one to the function so the test is performed on all three browsers!
Fun huh? Let's move on, look at the basics of WebDriver syntax, in a bit more detail.
Let's have a look at a few key features of the webdriver syntax. For more complete details, you should consult the selenium-webdriver JavaScript API reference for a detailed reference, and the Selenium main documentation's Selenium WebDriver and WebDriver: Advanced Usage pages, which contain multiple examples to learn from written in different languages.
To start up a new test, you need to include the
selenium-webdriver
module like this:
const webdriver = require('selenium-webdriver'),
    By = webdriver.By,
    until = webdriver.until;
Next, you need to create a new instance of a driver, using the
new webdriver.Builder()
constructor. This needs to have the
forBrowser()
method chained onto it to specify what browser you want to test with this builder, and the
build()
method to actually build it (see the
Builder class reference
for detailed information on these features).
let driver = new webdriver.Builder()
    .forBrowser('firefox')
    .build();
Note that it is possible to set specific configuration options for browsers to be tested, for example you can set a specific version and OS to test in the
forBrowser()
方法:
let driver = new webdriver.Builder()
    .forBrowser('firefox', '46', 'MAC')
    .build();
You could also set these options using an environment variable, for example:
SELENIUM_BROWSER=firefox:46:MAC
Let's create a new test to allow us to explore this code as we talk about it. Inside your selenium test project directory, create a new file called
quick_test.js
, and add the following code to it:
var webdriver = require('selenium-webdriver'),
    By = webdriver.By,
    until = webdriver.until;
var driver = new webdriver.Builder()
    .forBrowser('firefox')
    .build();
To load the page you actually want to test, you use the
get()
method of the driver instance you created earlier, for example:
driver.get('http://www.google.com');
注意: 见 WebDriver class reference for details of the features in this section and the ones below it.
You can use any URL to point to your resource, including a
file://
URL to test a local document:
driver.get('file:///Users/chrismills/git/learning-area/tools-testing/cross-browser-testing/accessibility/fake-div-buttons.html');
or
driver.get('http://localhost:8888/fake-div-buttons.html');
But it is better to use a remote server location so the code is more flexible — when you start using a remote server to run your tests (see later on), your code will break if you try to use local paths.
Add this line to the bottom of
quick_test.js
now:
driver.get('https://mdn.github.io/learning-area/tools-testing/cross-browser-testing/accessibility/native-keyboard-accessibility.html');
Now we've got a document to test, we need to interact with it in some way, which usually involves first selecting a specific element to test something about. You can
select UI elements in many ways
in WebDriver, including by ID, class, element name, etc. The actual selection is done by the
findElement()
method, which accepts as a parameter a selection method. For example, to select an element by ID:
const element = driver.findElement(By.id('myElementId'));
One of the most useful ways to find an element by CSS — the By.css method allows you to select an element using a CSS selector
Enter the following at the bottom of your
quick_test.js
code now:
const button = driver.findElement(By.css('button:nth-of-type(1)'));
There are many ways to interact with your web documents and elements on them. You can see useful common examples starting at Getting text values on the WebDriver docs.
If we wanted to get the text inside our button, we could do this:
button.getText().then(function(text) {
  console.log('Button text is \'' + text + '\'');
});
Add this to
quick_test.js
now.
Making sure you are inside your project directory, try running the test:
node quick_test.js
You should see the button's text label reported inside the console.
let's do something a bit more useful. delete the previous code entry, then add this line at the bottom instead:
button.click();
Try running your test again; the button will be clicked, and the
alert()
popup should appear. At least we know the button is working!
You can interact with the popup too. Add the following to the bottom of the code, and try testing it again:
let alert = driver.switchTo().alert();
alert.getText().then(function(text) {
  console.log('Alert text is \'' + text + '\'');
});
alert.accept();
Next, let's try entering some text into one of the form elements. Add the following code and try running your test again:
const input = driver.findElement(By.id('name'));
input.sendKeys('Filling in my form');
You can submit key presses that can't be represented by normal characters using properties of the
webdriver.Key
object. For example, above we used this construct to tab out of the form input before submitting it:
driver.sleep(1000).then(function() {
  driver.findElement(By.name('q')).sendKeys(webdriver.Key.TAB);
});
There are times where you'll want to make WebDriver wait for something to complete before carrying on. For example if you load a new page, you'll want to wait for the page's DOM to finish loading before you try to interact with any of its elements, otherwise the test will likely fail.
In our
google_test.js
test for example, we included this block:
driver.sleep(2000).then(function() {
  driver.getTitle().then(function(title) {
    if(title === 'webdriver - Google Search') {
      console.log('Test passed');
    } else {
      console.log('Test failed');
    }
  });
});
sleep()
method accepts a value that specifies the time to wait in milliseconds — the method returns a promise that resolves at the end of that time, at which point the code inside the
then()
executes. In this case we get the title of the current page with the
getTitle()
method, then return a pass or fail message depending on what its value is.
We could add a
sleep()
method to our
quick_test.js
test too — try wrapping your last line of code in a block like this:
driver.sleep(2000).then(function() {
  input.sendKeys('Filling in my form');
  input.getAttribute("value").then(function(value) {
    if(value !== '') {
      console.log('Form input editable');
    }
  });
});
WebDriver will now wait for 2 seconds before filling in the form field. We then test whether its value got filled in (i.e. is not empty) by using
getAttribute()
to retrieve it's
value
attribute value, and print a message to the console if it is not empty.
注意:
There is also a method called
wait()
, which repeatedly tests a condition for a certain length of time, and then carries on executing the code. This also makes use of the
util library
, which defines common conditions to use along with
wait()
.
After you've finished running a test, you should shut down any driver instances you've opened, to make sure that you don't end up with loads of rogue browser instances open on your machine! This is done using the
quit()
method. Call this on your driver instance when you are finished with it. Add this line to the bottom of your
quick_test.js
test now:
driver.quit();
When you run it, you should now see the test execute and the browser instance shut down again after the test is complete. This is useful for not cluttering up your computer with loads of browser instances, especially if you have so many that it is causing the computer to slow down.
There has been a lot written about best practices for writing tests. You can find some good background information at Test Design Considerations . In general, you should make sure that your tests are:
google_test.js
test we looked at above is pretty good, as it just tests a single thing — whether the title of a search results page is set correctly. We could work on giving it a better name so it is easier to work out what it does if we add more google tests. Perhaps
results_page_title_set_correctly.js
would be slightly better?
In addition, we should mention test results/reporting — we've been reporting results in our above examples using simple
console.log()
statements, but this is all done in JavaScript, so you can use whatever test running and reporting system you want, be it
Mocha
,
Chai
, or some other tool.
mocha_test.js
example inside your project directory. Put it inside a subfolder called
test
. This example uses a long chain of promises to run all the steps required in our test — the promise-based methods WebDriver uses need to resolve for it to work properly.
npm install --save-dev mocha
test
directory) using the following command:
npx mocha --no-timeouts
--no-timeouts
flag to make sure your tests don't end up failing because of Mocha's arbitrary timeout (which is 3 seconds).
注意: saucelabs-sample-test-frameworks contains several useful examples showing how to set up different combinations of test/assertion tools.
It turns out that running tests on remote servers isn't that much more difficult than running them locally. You just need to create your driver instance, but with a few more features specified, including the capabilities of the browser you want to test on, the address of the server, and the user credentials you need (if any) to access it.
Getting Selenium tests to run remotely on LambdaTest is very simple. The code you need should follow the pattern seen below.
Let's write an example:
lambdatest_google_test.js
const webdriver = require('selenium-webdriver');
    By = webdriver.By,
    until = webdriver.until;
// username: Username can be found at automation dashboard
const USERNAME = '{username}';
// AccessKey:  AccessKey can be generated from automation dashboard or profile section
const KEY = '{accessKey}';
// gridUrl: gridUrl can be found at automation dashboard
const GRID_HOST = 'hub.lambdatest.com/wd/hub';
function searchTextOnGoogle() {
// Setup Input capabilities
    const capabilities = {
       platform: 'windows 10',
       browserName: 'chrome',
       version: '67.0',
       resolution: '1280x800',
       network: true,
       visual: true,
       console: true,
       video: true,
       name: 'Test 1', // name of the test
       build: 'NodeJS build' // name of the build
     };
// URL: https://{username}:{accessToken}@hub.lambdatest.com/wd/hub
const gridUrl = 'https://' + USERNAME + ':' + KEY + '@' + GRID_HOST;
// setup and build selenium driver object
     const driver = new webdriver.Builder()
     .usingServer(gridUrl)
     .withCapabilities(capabilities)
     .build();
// navigate to a url, search for a text and get title of page
driver.get('https://www.google.com/ncr').then(function() {
    driver.findElement(webdriver.By.name('q')).sendKeys('LambdaTest\n').then(function() {
         driver.getTitle().then(function(title) {
               setTimeout(function() {
               console.log(title);
               driver.quit();
               }, 5000);
            });
         });
      });
   }
searchTextOnGoogle();
{username}
and
{accessKey}
placeholders in the code with your actual user name and access key values (and make sure you keep them secure).
node lambdatest_google_test
The test will be sent to LambdaTest, and the output of your test will be reflected on your LambdaTest console.
If you wish to extract these results for reporting purpose from LambdaTest platform then you can do so by using
LambdaTest restful API
.
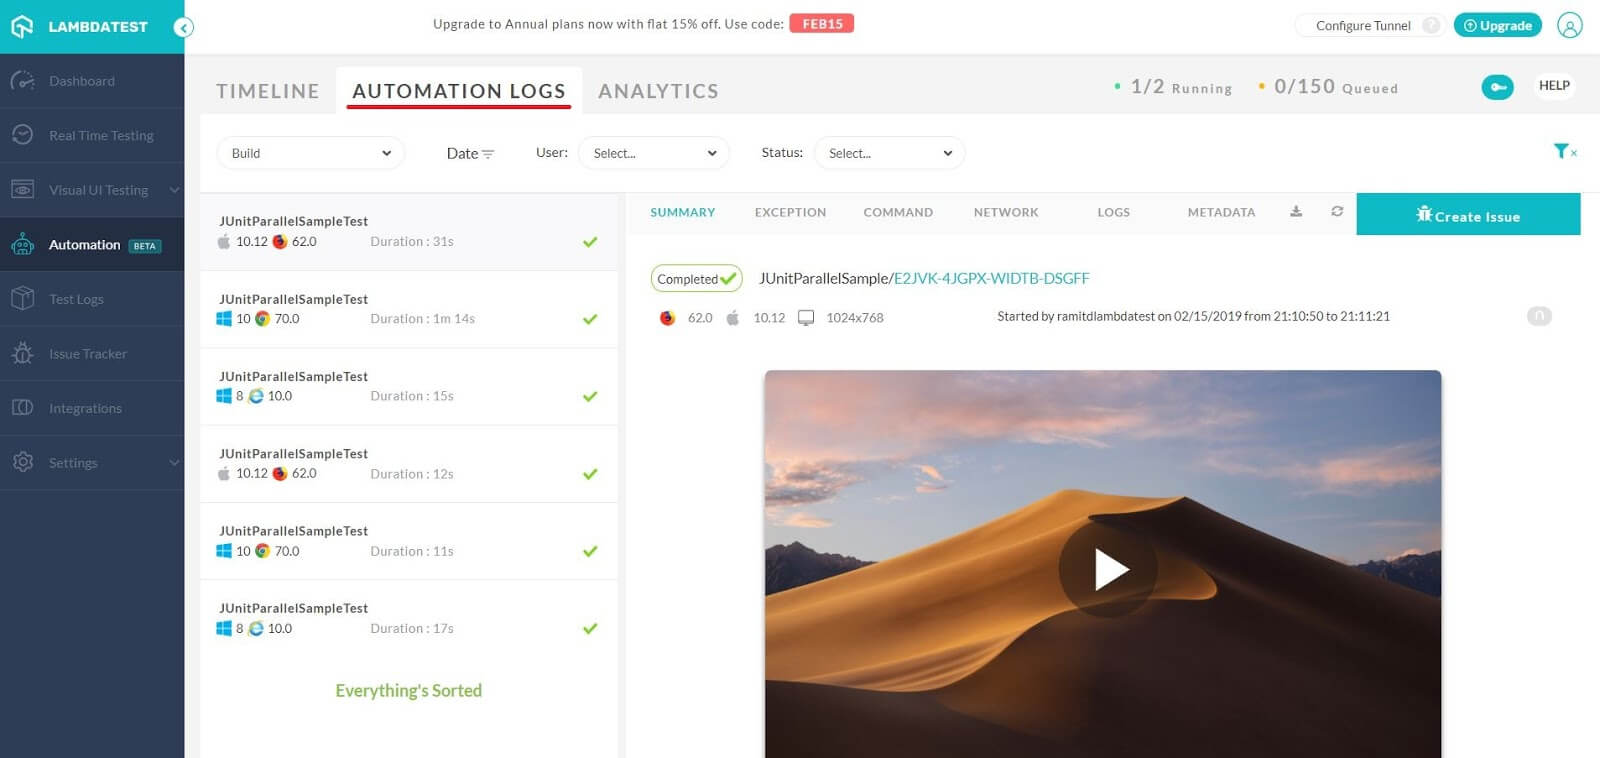 You can retrieve network, command, exception, and Selenium logs for every test within your test build. You will also find a video recording of your Selenium script execution.
注意: HELP button on LambdaTest Automation Dashboard will provide you with an ample amount of information to help you get started with LambdaTest automation. You can also follow our documentation about running first Selenium script in Node JS .
注意: If you don't want to write out the capabilities objects for your tests by hand, you can generate them using the Selenium Desired Capabilities Generator .
When executing numerous automation tests, marking their status as passed or failed makes the task a lot easier.
driver.executeScript("lambda-status=passed");
driver.executeScript("lambda-status=failed");
Getting Selenium tests to run remotely on BrowserStack is easy. The code you need should follow the pattern seen below.
Let's write an example:
bstack_google_test.js
.
const webdriver = require('selenium-webdriver'),
    By = webdriver.By,
    until = webdriver.until;
// Input capabilities
let capabilities = {
   'browserName' : 'Firefox',
   'browser_version' : '56.0 beta',
   'os' : 'OS X',
   'os_version' : 'Sierra',
   'resolution' : '1280x1024',
   'browserstack.user' : 'YOUR-USER-NAME',
   'browserstack.key' : 'YOUR-ACCESS-KEY',
   'browserstack.debug' : 'true',
   'build' : 'First build'
};
let driver = new webdriver.Builder().
  usingServer('http://hub-cloud.browserstack.com/wd/hub').
  withCapabilities(capabilities).
  build();
driver.get('http://www.google.com');
driver.findElement(By.name('q')).sendKeys('webdriver');
driver.sleep(1000).then(function() {
  driver.findElement(By.name('q')).sendKeys(webdriver.Key.TAB);
});
driver.findElement(By.name('btnK')).click();
driver.sleep(2000).then(function() {
  driver.getTitle().then(function(title) {
    if(title === 'webdriver - Google Search') {
      console.log('Test passed');
    } else {
      console.log('Test failed');
    }
  });
});
driver.quit();
YOUR-USER-NAME
and
YOUR-ACCESS-KEY
placeholders in the code with your actual user name and access key values (and make sure you keep them secure).
node bstack_google_test
The test will be sent to BrowserStack, and the test result will be returned to your console. This shows the importance of including some kind of result reporting mechanism!

If you click on the link for your test, you'll get to a new screen where you will be able to see a video recording of the test, and multiple detailed logs of information pertaining to it.
注意: 资源 menu option on the Browserstack automation dashboard contains a wealth of useful information on using it to run automated tests. See Node JS Documentation for writing automate test scripts in Node JS for the node-specific information. Explore the docs to find out all the useful things BrowserStack can do.
注意: If you don't want to write out the capabilities objects for your tests by hand, you can generate them using the generators embedded in the docs. See Run tests on mobile browsers and Run tests on desktop browsers .
You can use the BrowserStack REST API and some other capabilities to annotate your test with more details, such as whether it passed, why it passed, what project the test is part of, etc. BrowserStack doesn't know these details by default!
Let's update our
bstack_google_test.js
demo, to show how these features work:
const request = require("request");
capabilities
object to include a project name — add the following line before the closing curly brace, remembering to add a comma at the end of the previous line (you can vary the build and project names to organize the tests in different windows in the BrowserStack automation dashboard):
'project' : 'Google test 2'
sessionId
of the current session, so we know where to send the request (the ID is included in the request URL, as you'll see later). Include the following lines just below the block that creates the
driver
对象 (
let driver ...
) :
let sessionId;
driver.session_.then(function(sessionData) {
    sessionId = sessionData.id_;
});
driver.sleep(2000)
... block near the bottom of the code to add REST API calls (again, replace the
YOUR-USER-NAME
and
YOUR-ACCESS-KEY
placeholders in the code with your actual user name and access key values):
driver.sleep(2000).then(function() {
  driver.getTitle().then(function(title) {
    if(title === 'webdriver - Google Search') {
      console.log('Test passed');
      request({uri: "https://YOUR-USER-NAME:YOUR-ACCESS-KEY@www.browserstack.com/automate/sessions/" + sessionId + ".json", method:"PUT", form:{"status":"passed","reason":"Google results showed correct title"}});
    } else {
      console.log('Test failed');
      request({uri: "https://YOUR-USER-NAME:YOUR-ACCESS-KEY@www.browserstack.com/automate/sessions/" + sessionId + ".json", method:"PUT", form:{"status":"failed","reason":"Google results showed wrong title"}});
    }
  });
});
These are fairly intuitive — once the test completes, we send an API call to BrowserStack to update the test with a passed or failed status, and a reason for the result.
If you now go back to your BrowserStack automation dashboard page, you should see your test session available, as before, but with the updated data attached to it:

Getting Selenium tests to run remotely on Sauce Labs is also very simple, and very similar to BrowserStack albeit with a few syntactic differences. The code you need should follow the pattern seen below.
Let's write an example:
sauce_google_test.js
.
const webdriver = require('selenium-webdriver'),
    By = webdriver.By,
    until = webdriver.until,
    username = "YOUR-USER-NAME",
    accessKey = "YOUR-ACCESS-KEY";
let driver = new webdriver.Builder()
    .withCapabilities({
      'browserName': 'chrome',
      'platform': 'Windows XP',
      'version': '43.0',
      'username': username,
      'accessKey': accessKey
    })
    .usingServer("https://" + username + ":" + accessKey +
          "@ondemand.saucelabs.com:443/wd/hub")
    .build();
driver.get('http://www.google.com');
driver.findElement(By.name('q')).sendKeys('webdriver');
driver.sleep(1000).then(function() {
  driver.findElement(By.name('q')).sendKeys(webdriver.Key.TAB);
});
driver.findElement(By.name('btnK')).click();
driver.sleep(2000).then(function() {
  driver.getTitle().then(function(title) {
    if(title === 'webdriver - Google Search') {
      console.log('Test passed');
    } else {
      console.log('Test failed');
    }
  });
});
driver.quit();
YOUR-USER-NAME
and
YOUR-ACCESS-KEY
placeholders in the code with your actual user name and access key values (and make sure you keep them secure).
node sauce_google_test
The test will be sent to Sauce Labs, and the test result will be returned to your console. This shows the importance of including some kind of result reporting mechanism!

注意: Sauce Labs' Platform Configurator is a useful tool for generating capability objects to feed to your driver instances, based on what browser/OS you want to test on.
注意: for more useful details on testing with Sauce Labs and Selenium, check out Getting Started with Selenium for Automated Website Testing ,和 Instant Selenium Node.js Tests .
You can use the Sauce Labs API to annotate your test with more details, such as whether it passed, the name of the test, etc. Sauce Labs doesn't know these details by default!
To do this, you need to:
npm install saucelabs --save-dev
sauce_google_test.js
file, just below the previous variable declarations:
const SauceLabs = require('saucelabs');
let saucelabs = new SauceLabs({
    username : "YOUR-USER-NAME",
    password : "YOUR-ACCESS-KEY"
});
Again, replace the
YOUR-USER-NAME
and
YOUR-ACCESS-KEY
placeholders in the code with your actual user name and access key values (note that the saucelabs npm package rather confusingly uses
password
, not
accessKey
). Since you are using these twice now, you may want to create a couple of helper variables to store them in.
driver
variable (just below the
build()
line), add the following block — this gets the correct driver
sessionID
that we need to write data to the job (you can see it action in the next code block):
driver.getSession().then(function (sessionid){
      driver.sessionID = sessionid.id_;
});
driver.sleep(2000)
... block near the bottom of the code with the following:
driver.sleep(2000).then(function() {
  driver.getTitle().then(function(title) {
    if(title === 'webdriver - Google Search') {
      console.log('Test passed');
      let testPassed = true;
    } else {
      console.log('Test failed');
      let testPassed = false;
    }
    saucelabs.updateJob(driver.sessionID, {
      name: 'Google search results page title test',
      passed: testPassed
    });
  });
});
Here we've set a
testPassed
变量到
true
or
false
depending on whether the test passed or fails, then we've used the
saucelabs.updateJob()
method to update the details.
If you now go back to your Sauce Labs Automated Test dashboard page, you should see your new job now has the updated data attached to it:

If you don't want to use a service like Sauce Labs or BrowserStack, you can always set up your own remote testing server. Let's look at how to do this.
PATH
, do so now (see the
Setting up Selenium in Node
section).
java -jar selenium-server-standalone-3.0.0.jar
(update the
.jar
filename) so it matches exactly what file you've got.
http://localhost:4444/wd/hub
— try going there now to see what you get.
Now we've got the server running, let's create a demo test that will run on the remote selenium server.
google_test.js
file, and call it
google_test_remote.js
; put it in your project directory.
let driver = ...
) like so
let driver = new webdriver.Builder()
    .forBrowser('firefox')
    .usingServer('http://localhost:4444/wd/hub')
    .build();
node google_test_remote.js
So this is pretty cool. We have tested this locally, but you could set this up on just about any server along with the relevant browser drivers, and then connect your scripts to it using the URL you choose to expose it at.
As another point, it is also possible to integrate Selenium and related tools like LambdaTest, and Sauce Labs with continuous integration (CI) tools — this is useful, as it means you can run your tests via a CI tool, and only commit new changes to your code repository if the tests pass.
It is out of scope to look at this area in detail in this article, but we'd suggest getting started with Travis CI — this is probably the easiest CI tool to get started with and has good integration with web tools like GitHub and Node.
To get started, see for example:
注意: If you wish to perform continuous testing with codeless automation then you can use Endtest or TestingBot .
This module should have proven fun, and should have given you enough of an insight into writing and running automated tests for you to get going with writing your own automated tests.
最后修改: , 由 MDN 贡献者